Showing posts with label concealer. Show all posts

Thursday, July 5, 2018

For Dry Eyes Only: Review of IT Cosmetics Bye Bye Under Eye Full Coverage Anti-Aging Waterproof Concealer

Affiliate Links

Review of IT Cosmetics Bye Bye Under Eye Full Coverage Anti-Aging Waterproof Concealer

I have a wandering eye when it comes to makeup, and it usually doesn't do me much good. I have a totally reliable, nearly perfect under-eye concealer in the form of Sephora Gel Serum Concealer (reviewed here), and yet . . .

It Cosmetics Bye Bye Under Eye [insert long name here] is one of those concealers that comes up whenever people ask for recommendations, alongside things like Nars Radiant Creamy Concealer. So I was tempted. I should have known better, since it claims to be waterproof. Things can usually be waterproof or oil-proof, but not both (which makes perfect sense). I do have pretty watery eyes, so a waterproof concealer isn't a bad idea in theory, but my skin also tends to get oilier and oilier as the day goes on. It's almost always more important for my makeup to be able to withstand my oily skin than to resist water.  This concealer just doesn't hold up for me, unfortunately.

It has some great qualities that I'm sure contribute to its popularity. For one thing, it's incredibly pigmented, so that you only need a tiny bit of the thick product to cover the entire under-eye area. For me, this is all it takes for one eye:

Review of IT Cosmetics Bye Bye Under Eye Full Coverage Anti-Aging Waterproof Concealer

It also blends easily and covers well enough, initially. The packaging, a simple squeeze tube with a very narrow dispenser is great--it will limit the amount of air and bacteria that can get in, but also makes it easy to squeeze out the last few specks. Bye Bye Under Eye only comes in six shades. I chose the lightest, called Light (Very Fair). In makeup lingo, "light" and "very fair" are usually two different things, but sure. Here is a swatch compared to a bunch of other concealers to help you decode that label:

Swatches of IT Cosmetics Bye Bye Undereye in Light; Sephora Gel Serum Concealer in Fondant; Nars Radiant Creamy Concealer in Chantilly; Kevyn Aucoin Sensual Skin Enhancer in Sx02; Urban Decay 24/7 Concealer Pencil in CIA; Hard Candy Glamoflauge Concealer in Ultra Light.

From left to right: (1) IT Cosmetics Bye Bye Undereye in Light; (2) Sephora Gel Serum Concealer in Fondant; (3) Nars Radiant Creamy Concealer in Chantilly; (4) Kevyn Aucoin Sensual Skin Enhancer in Sx02; (5) Urban Decay 24/7 Concealer Pencil in CIA (discontinued); and (6) Hard Candy Glamoflauge Concealer in Ultra Light.

It Cosmetics Light is closest to Nars Chantilly. I found it to be a good match for my skin tone, fortunately, since the shade options were limited. It's probably a closer match than Sephora Fondant, in fact, though the extra warmth of Fondant means it actually does a better job of canceling out my dark circles. The consistency and pigmentation of Bye Bye Undereye is most similar to the Kevyn Aucoin Sensual Skin Enhancer, but the IT doesn't have that strong floral/powdery fragrance. (By the way, Hard Candy Ultra Light is the lightest concealer I have ever found, so if you have trouble finding something pale enough for you, it's worth a shot.)

On the downside, I found that Bye Bye Under Eye creased really badly on me and highlighted fine lines and flakiness that I didn't even know were there. I tried various application methods with no improvement. The photo below was taken immediately after application, patted on with my finger over well-moisturized but not primed skin. I'm not wearing any other makeup besides eyebrow pencil. (I forgot to take a before photo, but you can see the bare state of my dark circles here or here.)

Review of IT Cosmetics Bye Bye Under Eye Full Coverage Anti-Aging Waterproof Concealer

The coverage is good, but the texture isn't ideal, and it's creased a whole lot. Not a huge deal, maybe, because most concealers crease right after I apply them, and I can usually blend a little more after a few minutes to soften the creasing.

Here it is with the rest of my makeup applied, after a little more light blending with a sponge, and setting with No.7 loose powder (reviewed here).


The texture is worse, and instead of the creases smoothing out, the concealer has basically just lifted out of them. It has also already faded quite a bit just in the amount of time it took me to apply the rest of my makeup. Sigh. (As I said, I tried a few different application/blending/setting methods with the same results.)

Besides the lack of a smooth surface, the other big problem, which I mentioned above, is that the oil in my skin just devours this stuff. By the end of the day, there's very little left, except what was caught by those lines and flakes. Lovely.

Review of IT Cosmetics Bye Bye Under Eye Full Coverage Anti-Aging Waterproof Concealer

The photo above was taken after about eight hours on not a particularly hot or sweaty day. My skin is what you might euphemistically describe as dewy. Even so, my mascara (Tarte Lights, Camera, Lashes) and my eyebrow pencil (Essence Eyebrow Designer Pencil) have stuck around just fine. My dark circles are on major display, though.

To be fair, this is what happens to most concealers on my face. One of the things that impressed me so much about the Sephora Gel Serum (please never discontinue it, please, please, please) was that it was still there at the end of the day. So this problem doesn't necessarily make this concealer worse than all other concealers, just worst than my fave.

Clearly a lot of people out there like this stuff. My guess is that those people do not have oily skin. If you have drier skin and teary eyes, maybe this is great. (Though I would still be concerned that it would highlight flaky skin, to be honest.) But if your skin type is similar to mine, I certainly wouldn't recommend this product. I've already bought another tube of my trusty Sephora concealer, which costs $14 versus IT Cosmetics' $24--though note that the IT tube contains twice as much product, so if you like it and can get through it all before it starts to dry up, it's actually a better value.

If this concealer is your holy grail, I think it would be really helpful for people reading this review if you would comment and let me know what type of skin you have and what you look for in a concealer.

Anyway, lesson learned.

Maybe.

Probably not.

Wednesday, February 14, 2018

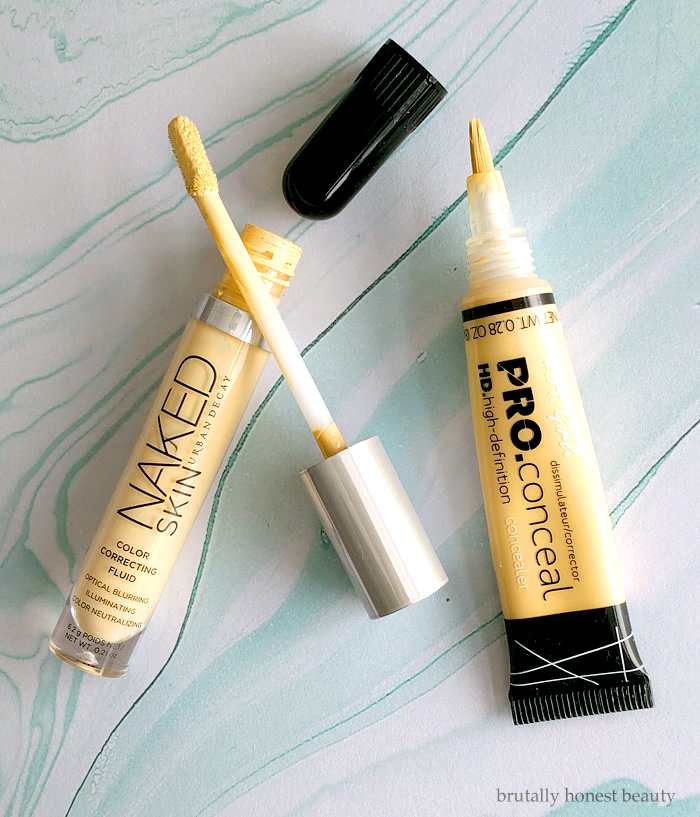
Concealing Redness with Yellow Corrector: Comparison of Urban Decay Color Correcting Fluid and L.A. Girl HD Pro Conceal

Affiliate Links

Urban Decay Color Correcting Fluid vs. L.A. Girl HD Pro Conceal in Yellow

On a daily basis, I don't tend to wear a full face of foundation or other base product. Some days I'll feel ambitious enough to slap on some tinted moisturizer, but it's rare that I use a fuller coverage foundation. Still, I have a significant amount of redness in my skin, especially in the center of my face, concentrated on either side of my nose. I've also been breaking out a lot lately, and that adds to the redness on my chin and forehead between my eyes. I want that shit to be less obvious.

Rather than covering my face with a uniform layer of product, my preferred camouflage is color corrector in the red areas, a liquid concealer under my eyes, and spot concealing for blemishes. Then I set everything with a loose powder, and I'm good to go. It probably takes nearly as much time for this routine as it would to use an opaque foundation, but for me, this is an easier, lower maintenance process. I also tend to like how my makeup looks by the end of the day. I've tried many foundations and I never really like how they wear, though some are better than others. Finally, I just don't love the feeling of foundation on my skin, and I get self-conscious about whether or not I'm rubbing it off somehow. So foundation is something that I tend to only use occasionally.

I've written about using the Urban Decay Naked Skin Color Correcting Fluid to conceal redness before (here). For whatever reason, yellow color correctors, as far as I've seen, are never advertised as targeting redness. In fact, I've never even seen anyone write a blog or Instagram post (etc.) saying that they use yellow corrector for this purpose. But I am here to tell you that if you haven't had good luck trying to cancel out redness with a green color corrector, it's worth giving yellow a shot instead. For me, green correctors tend to add a greyish cast to my skin, while yellow simply disguises the redness. You can see a comparison in my previous post of the subject, where I go into more detail about why I think this works.

(Yellow correctors are usually aimed at improving "brightness," but it's not clear to me exactly what problem this is correcting. If you use yellow for brightness, I'd love to hear about what it does for you.)

What I really want to do here is compare the Urban Decay yellow corrector, which contains 0.21 oz. of product for $28, with L.A. Girl HD Pro Conceal in Yellow, which contains 0.28 oz. for about $3-4 (depending where you buy it). I don't think I need to do any math for you to see the massive value difference there, so I had high hopes that the L.A. Girl option would be a functional substitute, since I use this corrector so much that I go through it very quickly. I'm not eager to drop another $28 on such a small product if I can avoid it.

Swatching the two yellow correctors, you can see some subtle differences. The Urban Decay corrector has a more opaque, whitish base, and the L.A. Girl corrector is slightly more translucent and lacks that white base. I'm not sure these differences are strong enough even to be visible in my photo, but they are detectable in person. Urban Decay on the left; L.A. Girl on the right.

Swatches of Urban Decay Color Correcting Fluid vs. L.A. Girl HD Pro Conceal in Yellow

Here's my bare face right now--as I said, I've been breaking out worse than usual for the past couple of months. I'm working on controlling that, but in the meantime, I'd like to disguise it.


You can see that the redness is concentrated on either side of my nose, but also between my eyebrows, and on my upper lip and chin. I also have mega dark circles that are reddish-purple.

Below I've applied the Urban Decay corrector on the left side of the photo, and the L.A. Girl on the right side of the photo. I've only used it over those red areas mentioned above. (I also put on mascara and brow pencil, as you can tell, because my face hairs are no longer completely invisible.)


I think you can see, despite the mediocre indoor lighting, that it works really well to conceal redness in a natural way on my skin. Can you see any differences between the right and left sides of my face? Personally, I can't see any in the photo, and I couldn't see any in person either. Any visible differences are just because the blemishes in my skin aren't perfectly symmetrical.

Here are closeups of each side so that you can see what the texture looks like on my skin. Again, I don't see any real difference. Both products have a slight tendency to highlight flakiness, but not dramatically, and not to the extent that I'm bothered by it.

Urban Decay:


L.A. Girl:


In these photos, I've used the corrector under my eyes, as well as on other red areas. For everyday use, I skip adding it to my eye area and just use my usual Sephora concealer (reviewed here), which has a slight yellow tint to it. I don't find that layering a yellow corrector under concealer in that area makes a big enough difference to be worth the extra work. I do, however, pat the extra Sephora concealer that's on my fingers after I blend it under my eyes on to the skin next to my nose. Then I spot conceal pimples with Urban Decay 24/7 Concealer Pencil, which seems, unfortunately, to have been discontinued. Finally, I set everything with loose powder.

Here's the final result with all my makeup (hey hey hooded eyelids!):


I like the results. As for other points of comparison between the Urban Decay and L.A. Girl correctors, the biggest difference is the packaging. The Urban Decay packaging is prettier, yes, but I also prefer it in terms of function.

Urban Decay Color Correcting Fluid and L.A. Girl HD Pro Conceal in yellow review

I apply my concealer/corrector with a flat concealer brush (I have this stupidly expensive Clé de Peau brush that I got for free, but anything similar should work). I'd much rather just pick up the product from the UD doefoot than squeeze it out of the L.A. tube into its stupid brush tip. It's harder to control how much comes out of the squeeze tube. I suppose it might be easier to use up the last dregs of the product left in the squeeze tube at the end of its life, however.

In terms of wear time, they're about the same for me. It's not all left at the end of the day, but my face is still less red than it would otherwise be, and the makeup doesn't look cakey or weird.

Overall, since most things are about equal, I'd certainly recommend the L.A. Girl yellow concealer. It's cheap enough that even if you want to just experiment and figure out if yellow corrector will do anything for you at all, you won't be taking much of a risk. But I don't think there's a real advantage to the Urban Decay option, anyway. The slightly more translucent base of the L.A. Girl product also makes me think that it would work better on darker skin than the whitish Urban Decay corrector--though there is probably a limit, because it is still a light yellow.

I was seriously surprised by how well this L.A. Girl HD Pro Conceal corrector worked for me, considering that I had tried one of their regular concealers in the past, and wasn't impressed (reviewed here). But for a product like this that isn't supposed to match skin tone and isn't supposed to create a totally opaque concealing layer, it's fantastic.

Is there seriously no one else out there who uses yellow to cover redness? Hello? Anyone?

Tuesday, April 11, 2017

Do I Need This? Color Correcting (with Urban Decay Naked Skin Color Correcting Fluid in Yellow and NYX Incredible Waterproof Concealer in Green)

Affiliate Links

Welcome to the latest installment of my Do I Need This? series. In these posts, I offer my experience and opinions about whether or not I think a product or technique is worth it. Obviously, you don't really need ANY beauty products, so the answer to the question is always going to be no, to some extent. But is it going to change your life (or face)? Is it going to make things easier? Are you going to notice any difference at all? That's what I'm getting at. You may disagree with my verdict, because we all have different bodies/faces/brains/desires, but I'll try to offer a starting point, at least.

Urban Decay Naked Skin Color Correcting Fluid in Yellow and NYX Incredible Waterproof Concealer in Green

Color correcting seemed to have a moment about a year ago, so as usual I'm coming along after the moment has passed to talk about it. It's weird to me, though, that color correcting could be a trend. When done right, it should be completely imperceptible, and how can that be trendy? It's like setting powder or concealer or moisturizer being temporarily trendy. I don't know. Anyway, a million and one color correcting products and palettes came out last year, and a few more, including the Urban Decay version here, are still popping up.

The idea of color correcting is that if areas of your face, or even your entire face, are "discolored," you can apply the opposite color to neutralize the discoloration--in theory. I put "discolored" in scare quotes because it's not like there are wrong skin tones, exactly, but if, for instance, your face is redder than your neck and that bothers you, there are ways to adjust that.

Do I need to color correct?

Short answer: The technique definitely works, but you might need to experiment to find the right color for your particular issue.

Wednesday, March 1, 2017

Quick updates to previous reviews

Affiliate Links

One of my bad teacher habits is, when students ask questions, to say, "Oh, that's a good question! I don't know. I'll look it up and get back to you!" And then I completely forget about it and never follow up. So I'm going to try to be a better blogger than I am a teacher and follow up on some points I said I would come back to after more testing. This is an especially important thing to do because the condition of my skin tends to vary quite a bit seasonally, so if I test something even for a few months in spring-summer, my experience might change in fall-winter, and vice versa. So here we go!

Marc Jacobs Beauty Glow Stick Glistening Illuminator in Spotlight

Marc Jacobs Beauty Glow Stick Glistening Illuminator in Spotlight (original review here): When I tested this cream highlighter last summer, I found that it tended to disappear from my skin after just a few hours. I wondered whether it would last longer in the winter, when my skin was slightly drier. Verdict: no. It's still completely gone save for a few sparkles by about the 3-4 hour mark. Too bad, because it's so lovely.

Biore UV Aqua Rich Watery Gel SPF 50+ PA++++

Biore UV Aqua Rich Watery Gel SPF 50+ PA++++ (original review here): Same sort of deal here--though in this case I wondered if the sunscreen would be worse, i.e. feel more drying, in the winter. Verdict: no. I've had no problems at all using this, regardless of how dry or oily my skin happens to be on a given day.


Stila Stay All Day Waterproof Liquid Eyeliner in Intense Black (original review here): I didn't specifically say in my review that I wanted to update this one, but I had to stop using it long before it had started to dry up, because the tip became hopelessly frayed. If you missed it, I recently reviewed the Physician's Formula liquid liner, and it's much, much better. From what people have said, the tip holds up, too.

Sephora Bright Future Gel Serum Concealer in Butter Cream (original review here): In my quick post about the second shade of this concealer that I bought, I wrote that it performed exactly the same as the first shade, Fondant. After using it for several more months, I have to say now that I don't think it's quite as good. The shade match for me is perfect, and the application is identical, but Butter Cream seems to crease a bit more and not to last quite as long as Fondant. So I think maybe these concealers, like many other products, vary in performance based on the shade you choose. If Fondant (reviewed here) seems like your match, though, I still heartily recommend it!


I posted about Hollar as a source of, among other things, discounted Essie, OPI, and China Glaze nail polish. I bought a bottle of Essie Leggy Legend from them for $3. Shipping was quick, products were as described, and the packing (above) was excellent. I recommend! (I also bought a cheese grater, two candles, and some hair elastics.)

I also added an additional photo to the end of my glitter primer post to show how it wears (and if it creases) after a full day, so if you missed that, check it out.

Oh, and in case you've been wondering if I've worn Kat Von D Poe (reviewed here) out of the house yet . . . . um, no. The shame. Oh, the shame.

That's all I've got for you right now, but always feel free to ask for updates on things I've reviewed in the past!

Thursday, September 29, 2016

Quick concealer swatches: Sephora Bright Future Gel Serum Concealer in Butter Cream and Fondant

Disclosure: Affiliate links.
As a birthday present to myself last month, I renewed my Sephora Flash subscription and bought a new tube of Sephora concealer (oooh! ahh!), which came with the Sephora birthday gift and various other junk (you can see my "haul" on Instagram). I reviewed the Sephora Gel Serum concealer last year, and I continue to love the shit out of it. But the shade I had, Fondant, wasn't a perfect match. I thought I'd quickly post swatches of the new shade I picked up, Butter Cream, alongside Fondant and Nars Radiant Creamy Concealer in Chantilly, in case it's helpful for anyone.

Swatches of Sephora Bright Future Gel Serum Concealer in Butter Cream and Fondant, and Nars Radiant Creamy Concealer in Chantilly

Left to right: Sephora Butter Cream, Sephora Fondant, and Nars Chantilly.

I've noticed that you really can't rely on Sephora's descriptions of these shades. They describe Fondant as "light with neutral undertone," when it's clearly warm/peachy. Butter Cream is also "light with neutral undertone," though in its case, that's more accurate. It's a really perfect match for me, both under my eyes and on redness/spots elsewhere on my face.

This shade performs for me exactly the same as Fondant in every other way, so refer to my previous review for details. I just love this stuff. I've been using Fondant for almost 10 months now, and there's still plenty left (which I will finish up by covering my dark circles on days when I wear a fuller-coverage foundation). It hasn't got thick or changed in any way. A year or more of concealing by someone who uses concealer almost every day isn't bad for $14.

Tuesday, August 23, 2016

Good but not great: Review of L.A. Girl Pro Conceal HD Concealer in Classic Ivory

Disclosure: Affiliate links.
LA Girl Pro Conceal HD Concealer in Classic Ivory

The L.A. Girl Pro Conceal HD Concealer got a lot of hype when it first appeared on the market a year or two ago as an excellent budget option. I'm pretty dedicated to the brilliance of my Sephora Gel Serum Concealer (reviewed here), but I never can resist the siren song of cheap shit. The regular price for a tube of this stuff is $2.99.

Unfortunately, this concealer wasn't very easy for me to find. Walgreens sells it, but the stores in my areas don't seem to carry L.A. Girl. In the winter, I ordered a tube from drugstore.com in the winter in the shade Classic Ivory, which, as you'll see, is at least a shade too dark. There are two lighter shades which have recently been added to the range, Porcelain and Light Ivory, but many stores don't seem to stock them. In fact, Walgreens doesn't even have Classic Ivory on its website. You can get the lighter shades from L.A. Girl's website, but they charge $5 a tube plus shipping. So Classic Ivory it is.

I have to say, if I'm forced to choose between a concealer a shade too dark or a shade too light, I will go with too dark. For my own face, I don't like the look of completely blanking out and highlighting away any shadows under my eyes. While I don't necessarily favor "natural" makeup in the sense that I want to look like I'm not wearing any makeup at all, I do prefer that sort of effect for my skin. I'd rather have a natural texture that isn't flawless than a "perfect" but unreal base. Almost everyone has some darkness below their eyes, even if it's just a literal shadow, so completely obliterating that can look a bit artificial. Besides which, applying a too-light concealer on top of a zit can highlight it and draw attention, which presumably is exactly what you don't want the concealer to do.

You can see from the swatches below that L.A. Girl Classic Ivory is one of the darkest and peachiest concealers I have on hand. Peach can be good for canceling out blue under-eye circles, but something a touch lighter and more neutral would work better for me.

Swatches of LA Girl Pro Conceal HD Concealer in Classic Ivory, Sephora Gel Serum Concealer in Fondant, TheBalm Time Balm Concealer in Lighter than Light, Clé de Peau Beauté Concealer in Beige, and Nars Radiant Creamy Concealer in Chantilly

Left to right above: L.A. Girl Pro Conceal HD Concealer in Classic Ivory, Sephora Gel Serum Concealer in Fondant (reviewed here), TheBalm Time Balm Concealer in Lighter than Light (reviewed here), ClĂ© de Peau BeautĂ© Concealer in Beige (reviewed here), and Nars Radiant Creamy Concealer in Chantilly (reviewed here).

Overall, I'd call this a decent budget option, but not an amazing one. The opacity is medium at best, as you can see below, where I have concealer applied on the left side of the photo and none on the right. You can layer it a bit to make it more opaque, but only to a certain point. On the plus side, this means it's very easy to blend and it has a natural, skin-like texture (the "HD" part?). The sheerness ameliorates the imperfect shade match. It also looks natural on other parts of the face. It's very hard to detect the product, except for where it settles into creases under my eyes.

Left: LA Girl concealer in Classic Ivory; right: nothing.
And it does crease. A lot. This close-up photo below was taken just a few minutes later, and you can see the creasing here, which gets worse throughout the day, even if I pat it to blend it repeatedly. This concealer a moist formula, which may be better for drier skin than for my oily summer skin. It never completely sets, so that means continual creasing for me. It also doesn't last as long as I'd like. At the end of the day it has faded considerably.


Generally, in a concealer I will trade some opacity for a natural texture, so this stuff is a win in that category. But then the creasing kind of cancels out that natural, undetectable quality, so it ends up in the "just ok" zone.

As for the packaging, the squeeze tube with a brush at the end is functional applicator, though the brush gets goopy because you never quite use up all the product in it. If you don't like the idea of putting an applicator right back into the product, however, this might be a welcome alternative. I've also noticed that this concealer tends to separate so that when I squeeze it out there is some clear fluid and some chunky pigment. I deal with that problem by brushing it on to the back of my hand to mix it and then applying it to my face from there. I wonder if the separation happened because I bought it online in the winter. It may have been frozen during shipping.

In the end, the L.A. Girl Pro Conceal Concealer in Classic Ivory is a decent product for the price. I like the natural finish, but I think it would only be ideal for people without too much to cover (though it's entirely possible that other shades are more opaque). It would work best for people who don't worry about creasing and probably for those with skin on the drier side.

The concealers that people have most often recommended to me are (on opposite ends of the price spectrum) Hard Candy Glamoflauge and IT Cosmetics Bye Bye Undereye Concealer, so when Sephora inevitably discontinues my holy grail (yeah, I said it) Serum Concealer, I will try one of those next.

Have you tried the L.A. Girl concealer? Any better luck? And where did you buy it? Drugstore.com has it marked down to $2.25, but they will soon be gone. And Amazon seems to only have it in 3-packs (for a reasonable price).

Saturday, July 16, 2016

Choix Subscription Box #3 (with mini reviews of Kevyn Aucoin Sensual Skin Enhancer, Chanel Le Vernis in Vamp, Hourglass Ambient Lighting Blush in Ethereal Glow, Tom Ford Matte Lip Color in Pussy Cat, and Laura Mercier Baked Eyeshadow in Black Karat)

Disclosure: Affiliate links.
For more information about this subscription, take a look at the detailed review of my first two boxes. For now, I'm going to jump right in to the products I sampled in June (I'm already way behind, since I got my July box over a week ago already). This subscription is a fun way for me to test and review some higher end products that I normally wouldn't pick up.

My third box was full of surprises--things I liked more that I expected, and things that made for disappointing swatches but worked much better in actual use. Here are the samples I picked this time:

Kevyn Aucoin Sensual Skin Enhancer, Chanel Le Vernis in Vamp

Chanel Le Vernis in Vamp and Kevyn Aucoin Sensual Skin Enhancer in Sx01.

Hourglass Ambient Lighting Blush in Ethereal Glow, Tom Ford Matte Lip Color in Pussy Cat, and Laura Mercier Baked Eyeshadow in Black Karat

Hourglass Ambient Lighting Blush in Ethereal Glow, Tom Ford Matte Lip Color in Pussy Cat, and Laura Mercier Baked Eyeshadow in Black Karat. They actually managed to preserve the "bacon" marbling in the Hourglass blush when repressing it! Impressive.

I also got these applicators, which as usual I could pretty much do without. I actually have no idea what the third thing is. This is the second time they've sent one of those. Any ideas?


Many, many photos below!

Wednesday, May 4, 2016

Would you buy a $70 concealer? (Review of Clé de Peau Beauté Concealer in Beige)

Disclosure: Affiliate links.
Clé de Peau Beauté Concealer in Beige

A couple months ago, ClĂ© de Peau BeautĂ© offered a free sample online of their cult favorite concealer, which came with a very nice brush. Look at that translucent indigo handle! (If you prefer to look at the untouched, unsmudged sample, here it is on my Instagram.) It's a very nice freebie. I don't think I ever managed to post this offer on my blog here, because it went out of stock very quickly.

But the fun thing is that it gives me a chance to review something I would never, ever have purchased--a stick concealer that sells for $70. Two caveats to my review here: first, the shade they sent is the second lightest in the very limited range, Beige (see all the shades swatched here), and it's a bit too dark for me, as you can see in my swatches below; and second, since this is a sample, I obviously can't comment on the packaging or anything like that.

Here are comparison swatches with some other concealers I had on hand. From left to right, we have ClĂ© de Peau BeautĂ© Concealer in Beige, Sephora Collection Bright Future Gel Serum Concealer in Fondant, Nars Radiant Creamy Concealer in Chantilly, and LA Girl Pro Conceal HD Concealer in Classic Ivory (reviews of those last two forthcoming!).

Swatches of Clé de Peau Beauté Concealer in Beige, Sephora Collection Bright Future Gel Serum Concealer in Fondant, Nars Radiant Creamy Concealer in Chantilly, and LA Girl Pro Conceal HD Concealer in Classic Ivory

Nevertheless, I don't consider these two things (shade, packaging) to be major impediments to a decent review, because slightly darker, peachy shades of concealer work pretty well under my eyes, at least if I'm going for a natural look. If I pick a pale shade that matches the edges of my face and use it to completely blank out my under-eye area, it creates a more polished and slightly artificial look. (Almost?) no one has bright, completely shadow-free skin below their eyes. That's good for photos but sometimes a bit more than what I want for normal everyday makeup. Also, I don't really give a fuck about the packaging. Sure, if the packaging were terrible I would be annoyed at paying $70 for it, but if the packaging were amazing and the product itself shitty, that would be much worse. I really only care about the concealer itself. And people have indeed suggested that, okay maybe this stuff is super expensive but it's totally worth it. JUST TRY IT YOU'LL SEE.

Is it? Here are my results, left side with no makeup (except filled-in brows) and right side with just ClĂ© de Peau BeautĂ© Concealer in Beige. You can see that the color, which looked much too dark on my arm, blends in pretty well on my face.

Slightly cross-eyed from staring into the sun while taking this photo.
I'd read tips saying that the best way to apply solid concealers like this one is to apply them to the back of your hand so that your body heat can warm them up a little and then spread them from there to your face with fingers or a brush. That does, indeed, seem to work best. Otherwise it's a bit stiff. The texture is nice and skin-like. It is quite pigmented, so that you can get good coverage with only a small amount of product. That said, if I want completely opaque coverage, I do have to layer it a little, and that tends not to work great. The problem with this stuff is that it creases, and the more I use, the more it creases. I haven't been able to do anything to prevent that (moisturizing or not, using different application techniques, primer, etc.), and it's one of my biggest annoyances with concealer. Most products crease on me, but if I had paid $70 for it, I would really not be impressed. Here is a photo of it about 20 minutes after application, after it had creased once and I had patted it down to smooth out the creasing and added some powder. It creased again. It continues to do that throughout the day, and the texture and opacity become less flawless.


So in the end, it's a good concealer in terms of coverage and texture. Since I only need to use a very small amount, one stick would probably last me years. But since it creases, I would never consider spending $70 on it--or even half that. My Sephora serum concealer (reviewed here) is still my favorite. It's slightly creasy, but it can be built up to increase the opacity without any problems, and the creasing tends not to recur after I smooth it out during the first half hour or so of wear.

Anyone have a different experience with that stuff? What's your upper spending limit for experimenting with products that have cult reputations like this stuff?

Thursday, December 3, 2015

Concealer comparisons (and a rave review): Sephora Collection Bright Future Gel Serum Concealer in Fondant vs. theBalm Time Balm Concealer in Lighter than Light in vs. Stila Stay All Day Concealer in Fair

Disclosure: Affiliate links.
The title gets really long when you include the full names of three different products!

Sephora Collection Bright Future Gel Serum Concealer in Fondant vs. theBalm Time Balm Concealer in Lighter than Light in vs. Stila Stay All Day Concealer in Fair

One of the only types of makeup I've worn consistently since high school is undereye concealer. I inherited extremely dark under-eye circles from my dad. I don't really have bags or puffiness, but I have dark purple half-circles (the shocking photo appears later in the post!) that are only enhanced by the contrast with my pale skin. I think the cause has something to do with my sinuses, but whatever it is, if I don't cover them, I look pretty sickly and ghoulish. As a result, I've tried dozens of concealers over the decades years, and I keep trying new ones. I think I've said before that I am a bit of a concealer Goldilocks--I'm always convinced that there must be one that's just right out there somewhere. I think I have finally found it, so read on to see which one of these it is.

In addition to very dark, purplish circles that need to be covered, I have some other challenges when it comes to finding an effective concealer. I have some lines/wrinkles under my eyes that tend to cause concealer to crease. My eyelids are also oily, which exacerbates the creasing and also makes things fade more quickly. As a bonus, the skin around under my eyes has a weirdly rough texture, which an inferior concealer will highlight.

(Be warned: long, detailed review with lots of photos ahead.)

Tuesday, July 28, 2015

Unintentional Project Pan

Disclosure: This post contains affiliate links from which I may earn a commission.

I guess you could call this being in a makeup rut, but I am going with unintentional project pan. That sounds more noble and interesting, doesn't it?

In case you're not familiar with the concept of "project pan," it's when people challenge themselves to use up enough of a makeup product (or multiple products) to "hit pan" - i.e. to reach the metal pan in the bottom of the product. I haven't been able to figure out where it originated, whether it was a specific blogger or in a community like Makeup Alley. Can anyone clue me in?

In my case, I realized this month that I was using the same handful of products day after day, though I hadn't chosen them deliberately to reach any particular goals. Some are things that I've vaguely thought I should try to use up, but I didn't vow to eschew all other makeup or anything. Most likely the reason I've been sticking with these few options is that I've been working from home, and most days I barely bother to wear makeup at all. When I do, I just grab a few things that I know are easy and effective, and that's that. I'm sure I will snap out of my rut project pan before too long, especially when I go back to working in an office (by the way, I finally got a job - temporary, but still a relief!). For now, these things are working for me, and I'm not sick of them yet, so I'm just going to go with it. Every now and then I put on a different lip color or blush, but for the most part it's been the things pictured here.


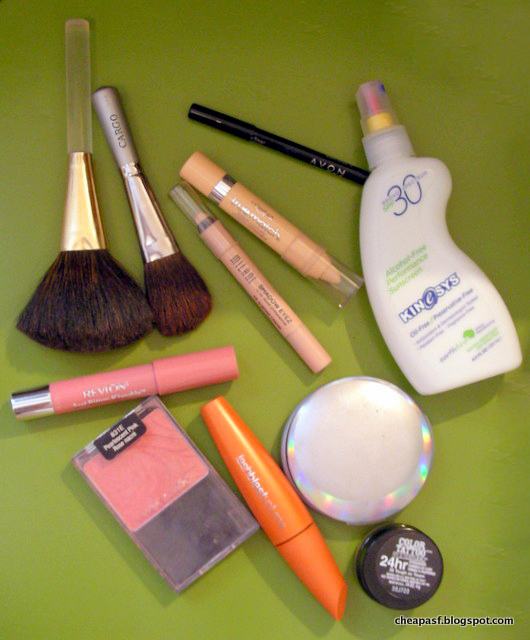
Here are the products in my unintentional project pan, listed clockwise from top left:

Urban Decay Perversion Mascara (sample)

I'm going to take a photo of this mascara on my lashes soon as an example of something I really like. It's light and fluffy and adds volume and length. It works well for me. This is the second mini-tube of this I've had, both of which came from subscription boxes. Sephora sells this "travel size" for $12, though, if you want to try it for a smaller price. Still more than a full size, good, drugstore mascara, though, and I'm not convinced it's that much better.

The Balm Stainiac

I should really write a dedicated review of this stuff, since I've been using it for years, and I love it. Since my lips are fairly dark/pink naturally, it nicely enhances the color while still looking natural. I don't really use it on my cheeks, because I find liquid blushes difficult to blend evenly (though this is more of a thin gel than a liquid).

Maybelline Color Tattoo in Bad to the Bronze

I've had this for ages and only recently (when I posted it on Instagram) remembered how much I like it. It's easy to use, since I just apply it with my fingers, and the shimmer makes it look multidimensional when blended from lashline into the crease. Some days I use Barely Branded (photos here) instead, for a more subtle look. If I'm going to be going out anywhere, I will use primer under Color Tattoos, but if I think I am going to be sitting home most of the day, I won't bother. Here are some primers I've tried recently.

Tarte Amazonian Clay 12-Hour Blush in Fearless (sample)

I've used this card sample at least 30 times and there's still some left. That goes to show you how incredibly long it would take to finish a full size blush. Has anyone ever done it? Tarte calls Fearless "pink coral," but I would has thought of it as more of a bubblegum pink. Maybe a tiny bit warmer than than, but not much. In fact, I thought it would look weirdly fake on me, but it's actually very natural and flattering. I don't know about the 12-hour claim. I never remember to check my blush at the end of the day to see if it's still there. I don't many (if any) completely matte powder blushes, which is why I've been drawn to this sample, I think. I might have to replace it with something similar when it's gone.

Avon Ultra Luxury Brow Liner in Blonde

Of the many, many eyebrow products I've tried (most of which are swatched and reviewed here), this is the one that I've found the easiest and quickest to use, and the most natural looking on me, regardless of my hair color. Even though my hair is medium brown right now, this works perfectly. Magic. (Look at the stub of the last pencil I used up. Aren't you impressed?)

Maybelline Instant Age Rewind Eraser Dark Circles in Fair

Almost empty! Mini review here. I like that it doesn't crease much, but since the color isn't quite right, I don't know if I will buy it again.

e.l.f. Tone Correcting Powder in Cool

Reviewed here. I use this to set the concealer and just generally all over my face. This stuff mattifies, but the effects don't last long in the summer, so I prefer to use something else if I'm actually going to be out in the sweaty summer world.

That's it! I expect I will be finishing a few of these before the end of the summer, so that will be a fun side effect of my unintentional project. Then I will have to think of what else I want to fixate on.

(Note: I'm playing around with using ShopStyle affiliate links, since it gives me more options than just using Amazon's. I can pick out the cheapest place to buy things, for instance - though that is often still Amazon. Let me know if there are any technical glitches if you end up clicking any of the links.)

Monday, October 28, 2013

8 minute basic, work appropriate makeup routine for the lazy and/or incompetent (using affordable products)

8 minute basic, work appropriate makeup routine
See below for the list of products used.
Disclosure: This post contains Amazon affiliate links.
I feel like if this were a feature in a magazine, it would be called a 5-minute makeup look. But since I do not move quickly in the morning, I'd categorize it in the 8-12 minute range, to account for the time I spend staring blankly at the wall between each step. My criteria for choosing each product in this routine is what I oh-so-fucking-cleverly decided to call the "fast/last" rule. That is, it has to apply fast, and it has to last through most of the day without reapplying. Fast, for me, means minimizing the use of tools like brushes. If I can smear it directly on my face, great. Your version of the routine might include more or fewer steps, depending on what you like/need. For instance, I'm lucky enough that my skin is fairly clear, or at least there isn't too much that I really strongly feel like I need to cover up. I just go with concealer and powder when I am in a hurry. That's just me. If you prefer to use foundation etc., then you'd have to factor in the extra time for that.

By the way, the "lazy and/or incompetent" bit in the title refers to me in the morning. Also during the rest of the day, but mostly the morning.

Here's are the steps I take:

Wednesday, October 9, 2013

Doubling Up with Off-label Makeup Use (eyeshadow as concealer)

Disclosure: This post contains affiliate links.
In this post I'm not talking about just buying something to use for a different purpose than the one for which it's advertised. So you might buy a darker shade of pressed powder and use it for contouring, but since you're presumably not using it as all-over powder too, you're not doubling up. I'm talking about products that you can use for their intended purpose and a secondary one (or more).

I've discovered a particularly exciting example recently (at least for me). It involves the wonderful Milani Shadow Eyez in neutral matte shades that came out in the spring. They're limited edition, but I saw them only a week ago at my local CVS, and you can get them online at from Cherry Culture and elsewhere. The one called Almond Cream makes a nice light base shadow, and you can check out swatches and a review of all of them in their intended use as eyeshadow from Nouveau Cheap.
Milani Naturally Chic Shadow Eyez in Almond Cream and  L'Oreal True Match Super Blendable Crayon Concealer  in Fair/Light
Milani Shadow Eyez in Almond Cream and
L'Oreal True Match Super Blendable Crayon Concealer
in Fair/Light
I figured out recently that the lightest shade makes an awesome spot concealer. I have really pale, neutral skin, so concealers are often a little too pink or yellow or orange for me. The color of this pencil is really, really close to my exact skin tone. It could be a touch paler, but other than that, it's nearly perfect. It also lasts better than any actual concealer I've tried on my combination-oily skin. And I have tried so many. So fucking many. Almost everything is mostly gone after a couple of hours (with the exception of this Maybelline concealer, which is second best). The Milani stuff has even survived a nap! You just have to make sure to blend it immediately, because when it's set, it's set.

Wednesday, August 7, 2013

The frustration of finding makeup matches for WOC (and why foundation is never going to look "natural", sorry) (From The Toast)

This article talks about the options for women whose skin is darker than "medium fair", as well as all the limitations. There are also tips on using concealer that apply to those of us who don't have such a hard time finding products at the drugstore.

And the makeup artist author points out that you can have even coverage OR naturally-looking skin, but not both. So it's not that I just haven't found the right foundation that will look invisible on my skin. It doesn't exist, despite what all the blog reviews try to tell me. Time to lower the expectations, I guess. Or just stick with concealer and powder, like usual, and save myself some money.

Monday, March 25, 2013

Has anyone tried Laura Geller makeup? (It's on HauteLook today.)

I've heard that The Real Deal concealer is excellent. You can get it from HauteLook in this set for $25 with a lipgloss and blush (called the Big Apple Beauty Kit), and normally the concealer alone it around $21. But I can't decide if it's worth it when I don't really need more blush or lipgloss right now. Thoughts? Anything else from this brand worth checking out?

You need an account to browse HauteLook, so if you don't have one, here is my invite link.

Saturday, December 29, 2012

Fix Your Face Quick Review: NYX Concealer Wand


I have the NYX Concealer Wand in Fair (a.k.a. HD Photogenic Concealer - the label and the website description give different names). As part of my search for a good, affordable concealer, I've been using it for a couple months now, both for blemishes and under my eyes, so here's what I think.

Pros:

  • Good texture. It's creamy - not too thick, not too runny.
  • Sets quickly, but not too quickly. You have time to blend it.
  • Decent coverage. I have very light skin and dark fucking circles under my eyes (think: Uncle Fester), and this eliminates them in a natural-looking way.
  • Unscented.
  • Cheapish: $5.
Cons:
  • Settles into lines/wrinkles under eyes. I have to blend it multiple times while I'm applying the rest of my makeup, and each time I do, some of it gets removed.
  • Highlights dry skin/flakes. I think probably every concealer does, though.
  • Doesn't last. 3-4 hours later, I'm a zitty vampire again. It does a better job staying put on the blemishes than the eyes. Even over primer.
  • Very, very pale. The Fair shade is described as a "beige shade with pink undertones" on the NYX website, but it's so pale that it's almost white. Definitely check these out in person before buying.
For me, the cons outweigh the pros. It doesn't matter how well it camouflages my flaws if they pop up again a few hours later. This may be just because I have oily skin, but I want something that's both easy to use and lasts! And is cheap as fuck. I know it exists, somewhere. I'll keep using this until I find something better. It's not terrible. I prefer it to the Revlon ColorStay UnderEye Concealer, which I used once and then returned to CVS. It settled into lines AND didn't cover up my death rings for shit.
Related Posts Plugin for WordPress, Blogger...